


Learn to create an adorable Kawaii pumpkin with my easy-to-follow, step-by-step tutorial. Whether you’re a seasoned artist or a beginner, our guide simplifies the process, breaking it down into basic shapes and lines. Get ready to unleash your creativity and end up with a cute and cheerful Kawaii pumpkin that will brighten your day!
Printable version below, full version on Patreon
How to Draw a Cute Pumpkin
Show
files
Loading
|
File
|
Size
|
Type
|
Last Modified
|
Downloads
|
Get File |
|---|---|---|---|---|---|
|
174 KB
|
pdf
|
Dec 18, 2025
|
0
|
Download |
MATERIALS:
- Writing Utensil (pen, pencil, marker, etc.)
- Paper
- Eraser
- A smile
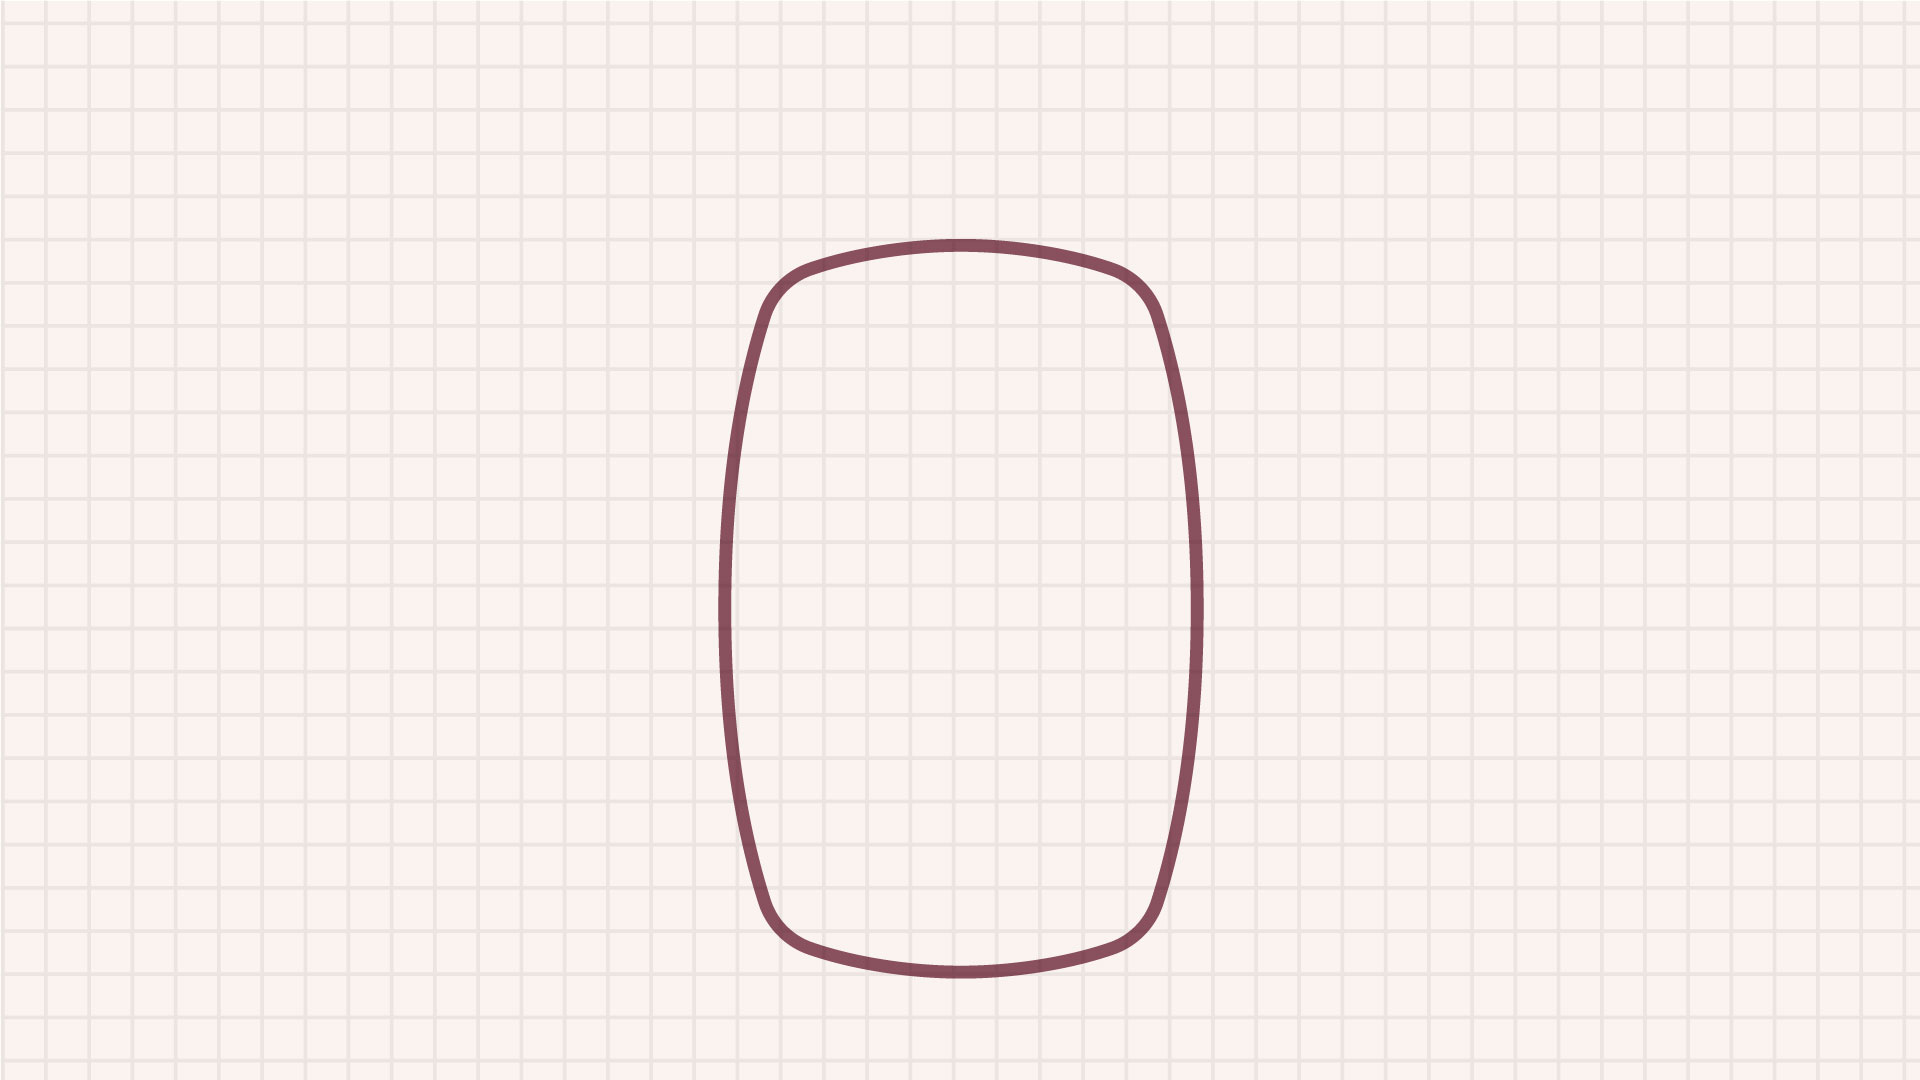
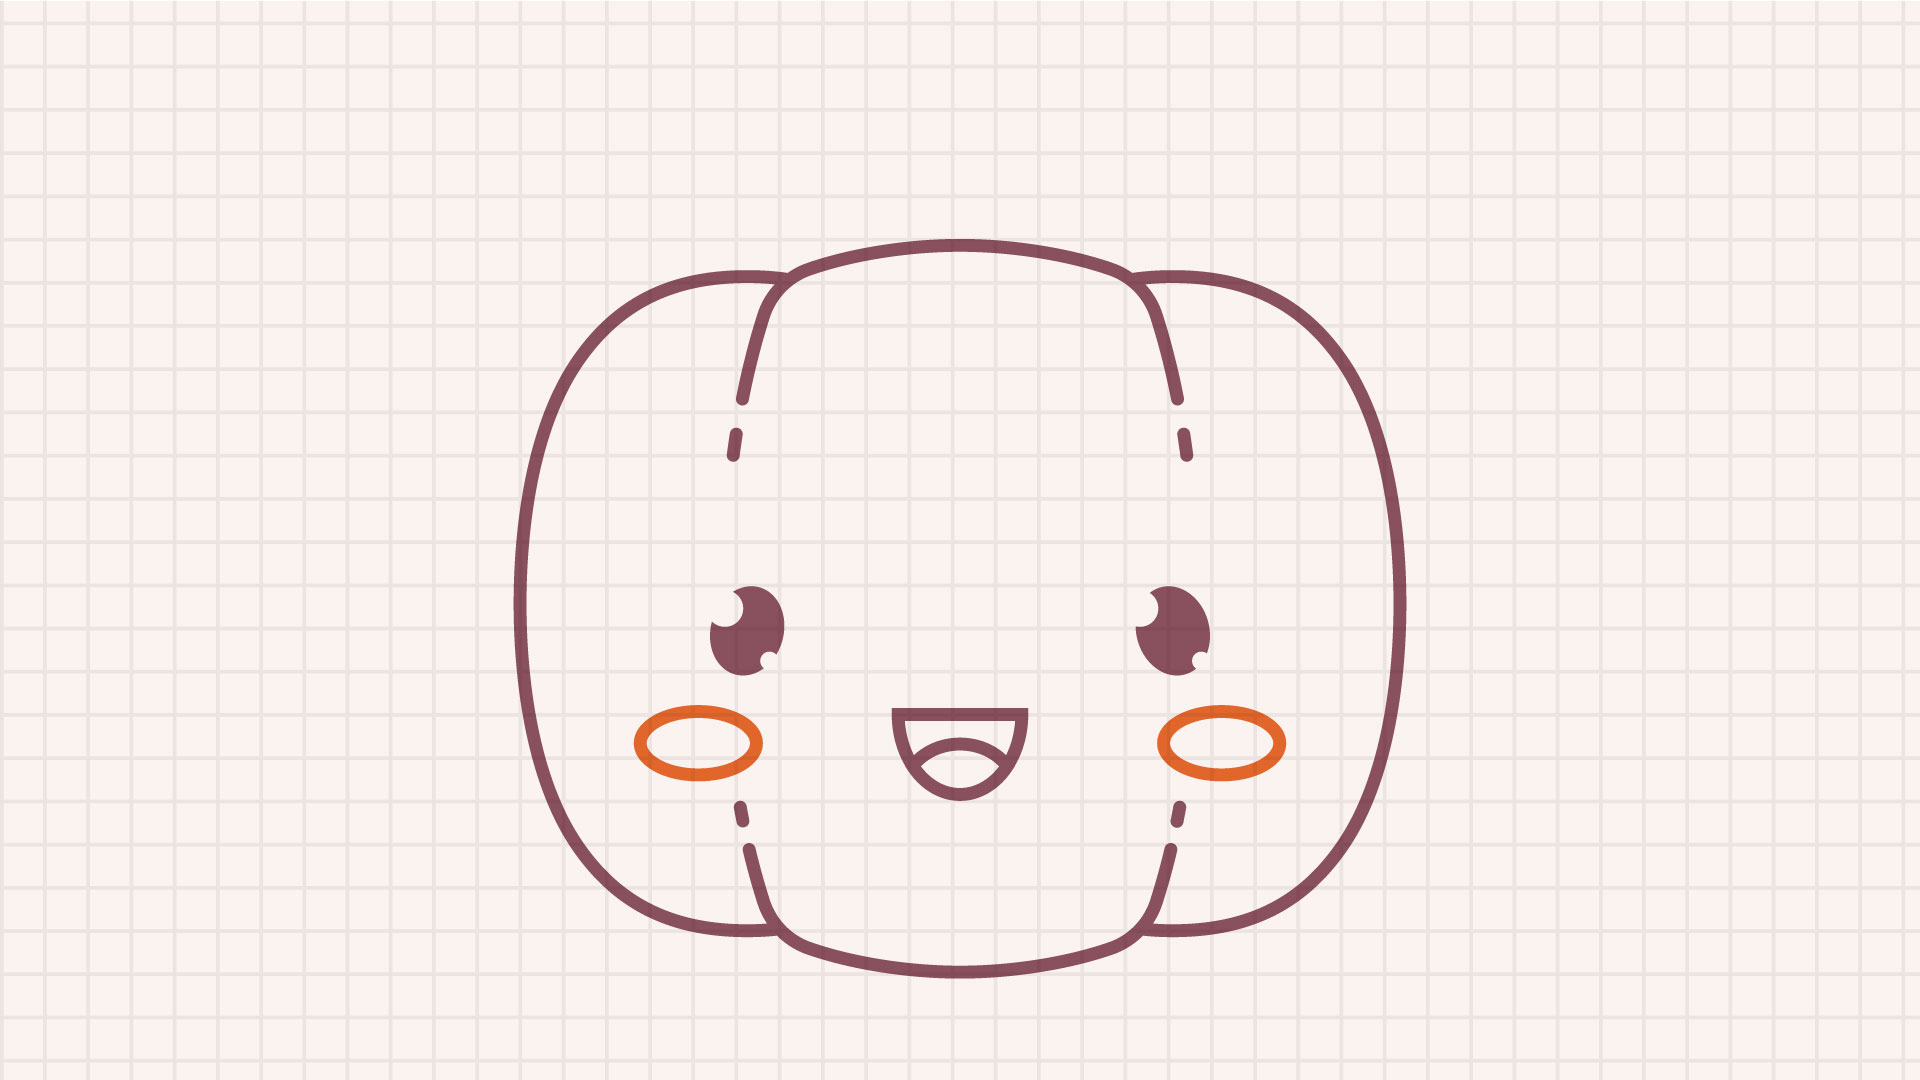
STEP 1
Draw the main part of the pumpkin.
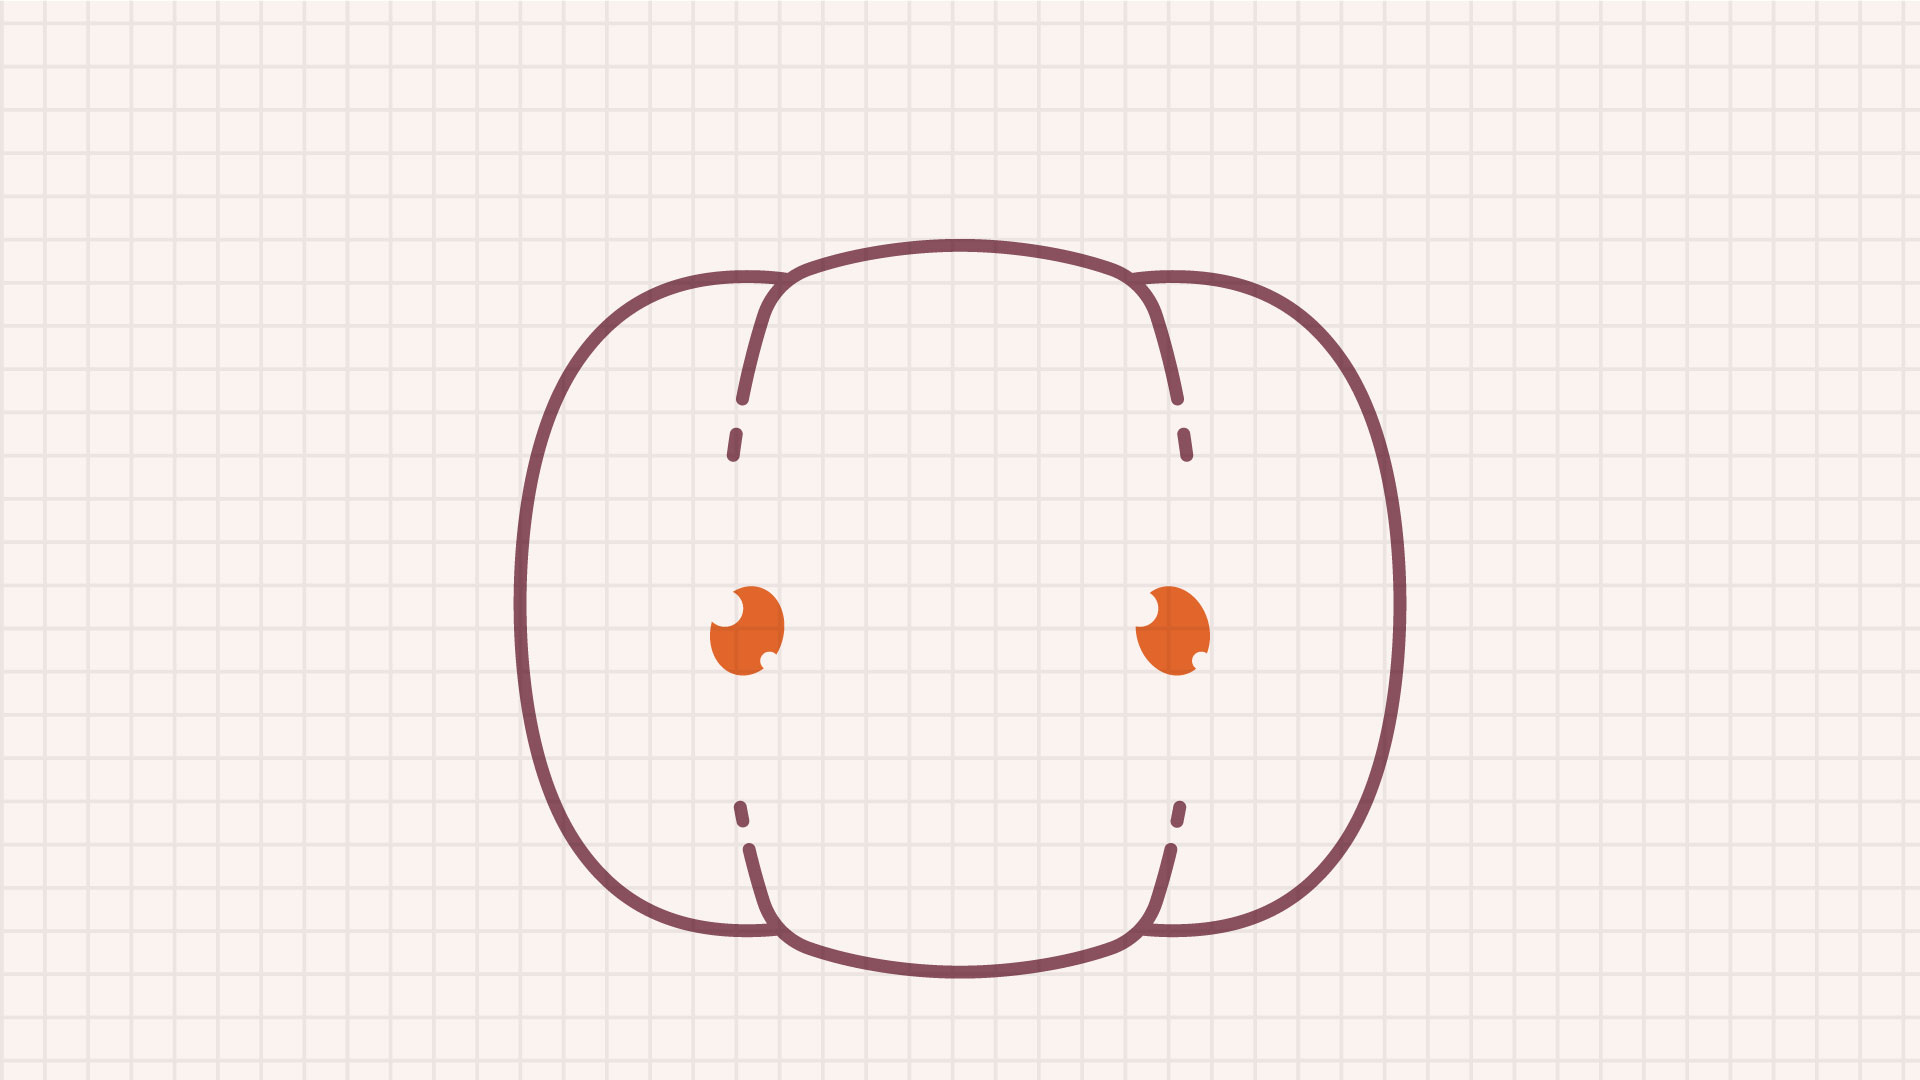
STEP 2
Draw the side parts of the pumpkin.

STEP 3
Draw two small eyes.
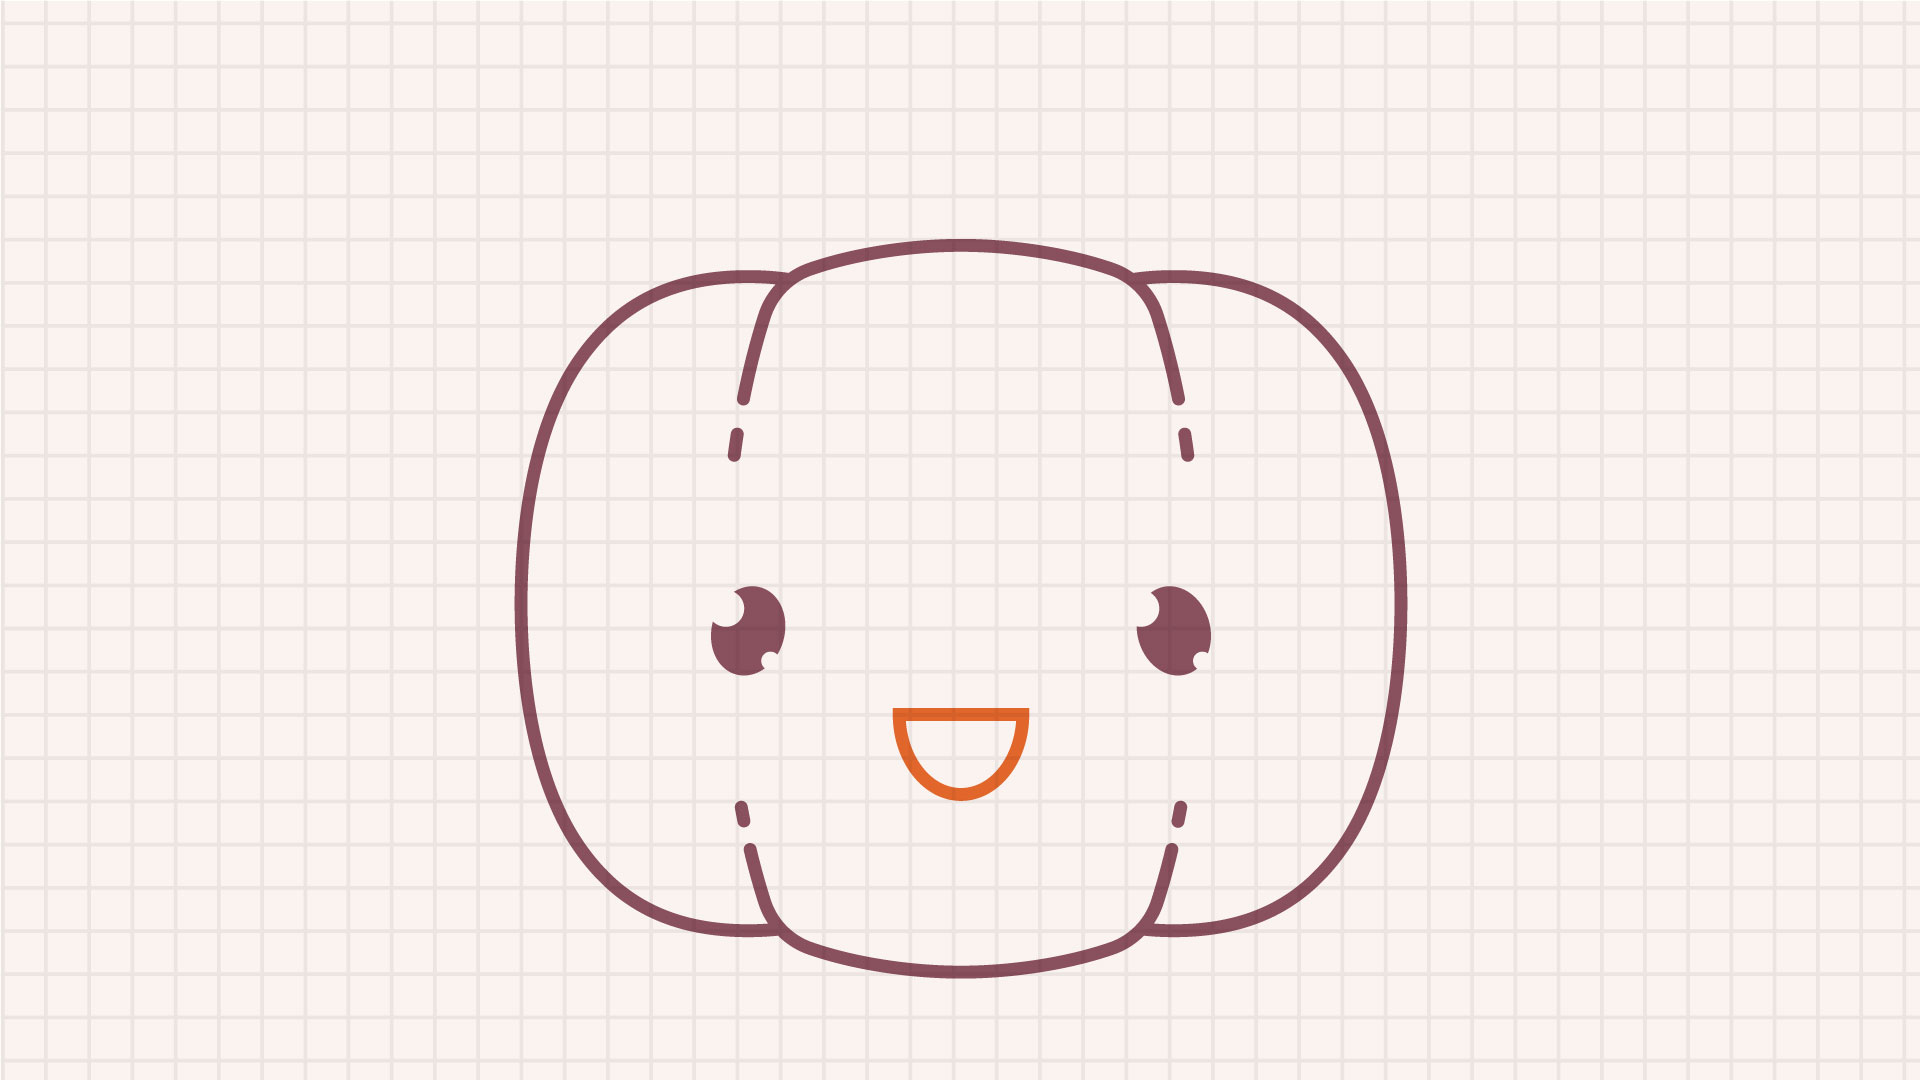
STEP 4
Draw a smile.
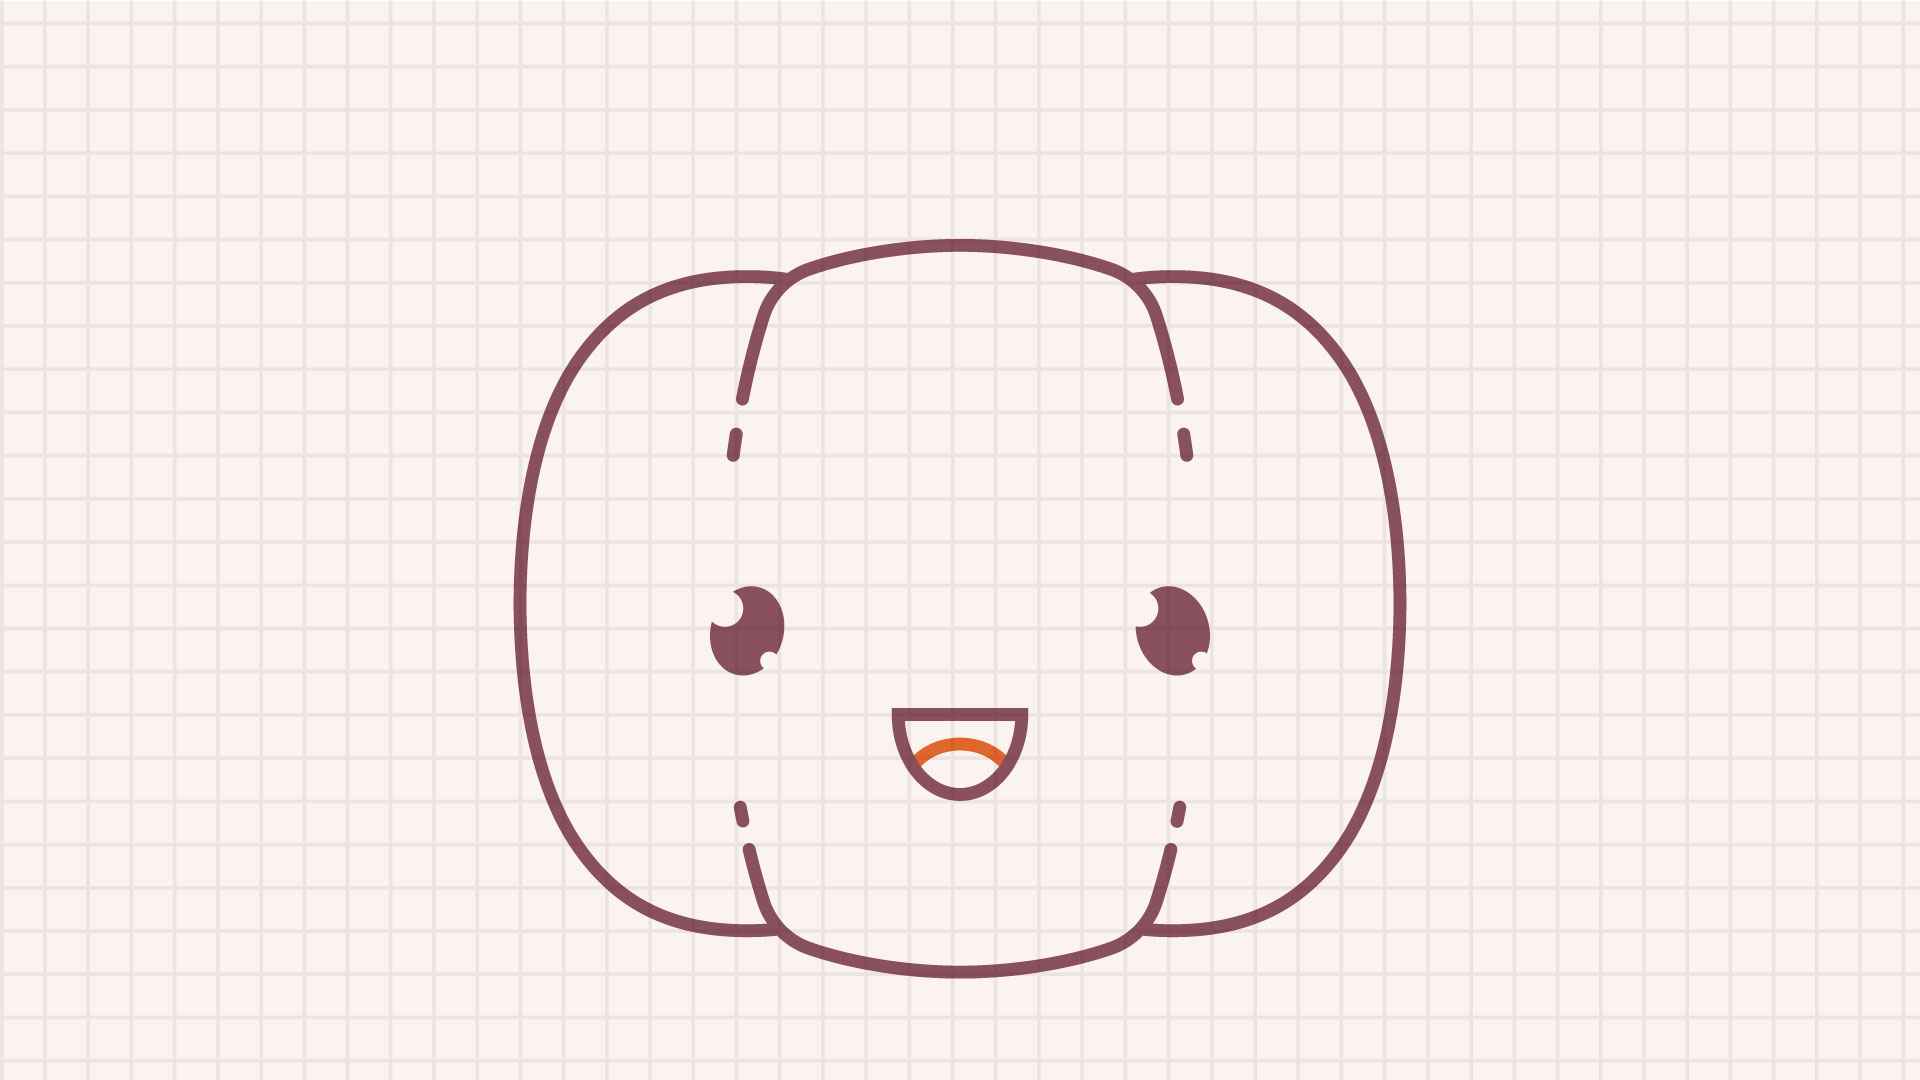
STEP 5
Add a small tongue to the mouth.
STEP 6
Add blush to the cheeks.
STEP 7
Draw a stem at the top of the pumpkin.

STEP 8
Draw a small leaf on the left side.
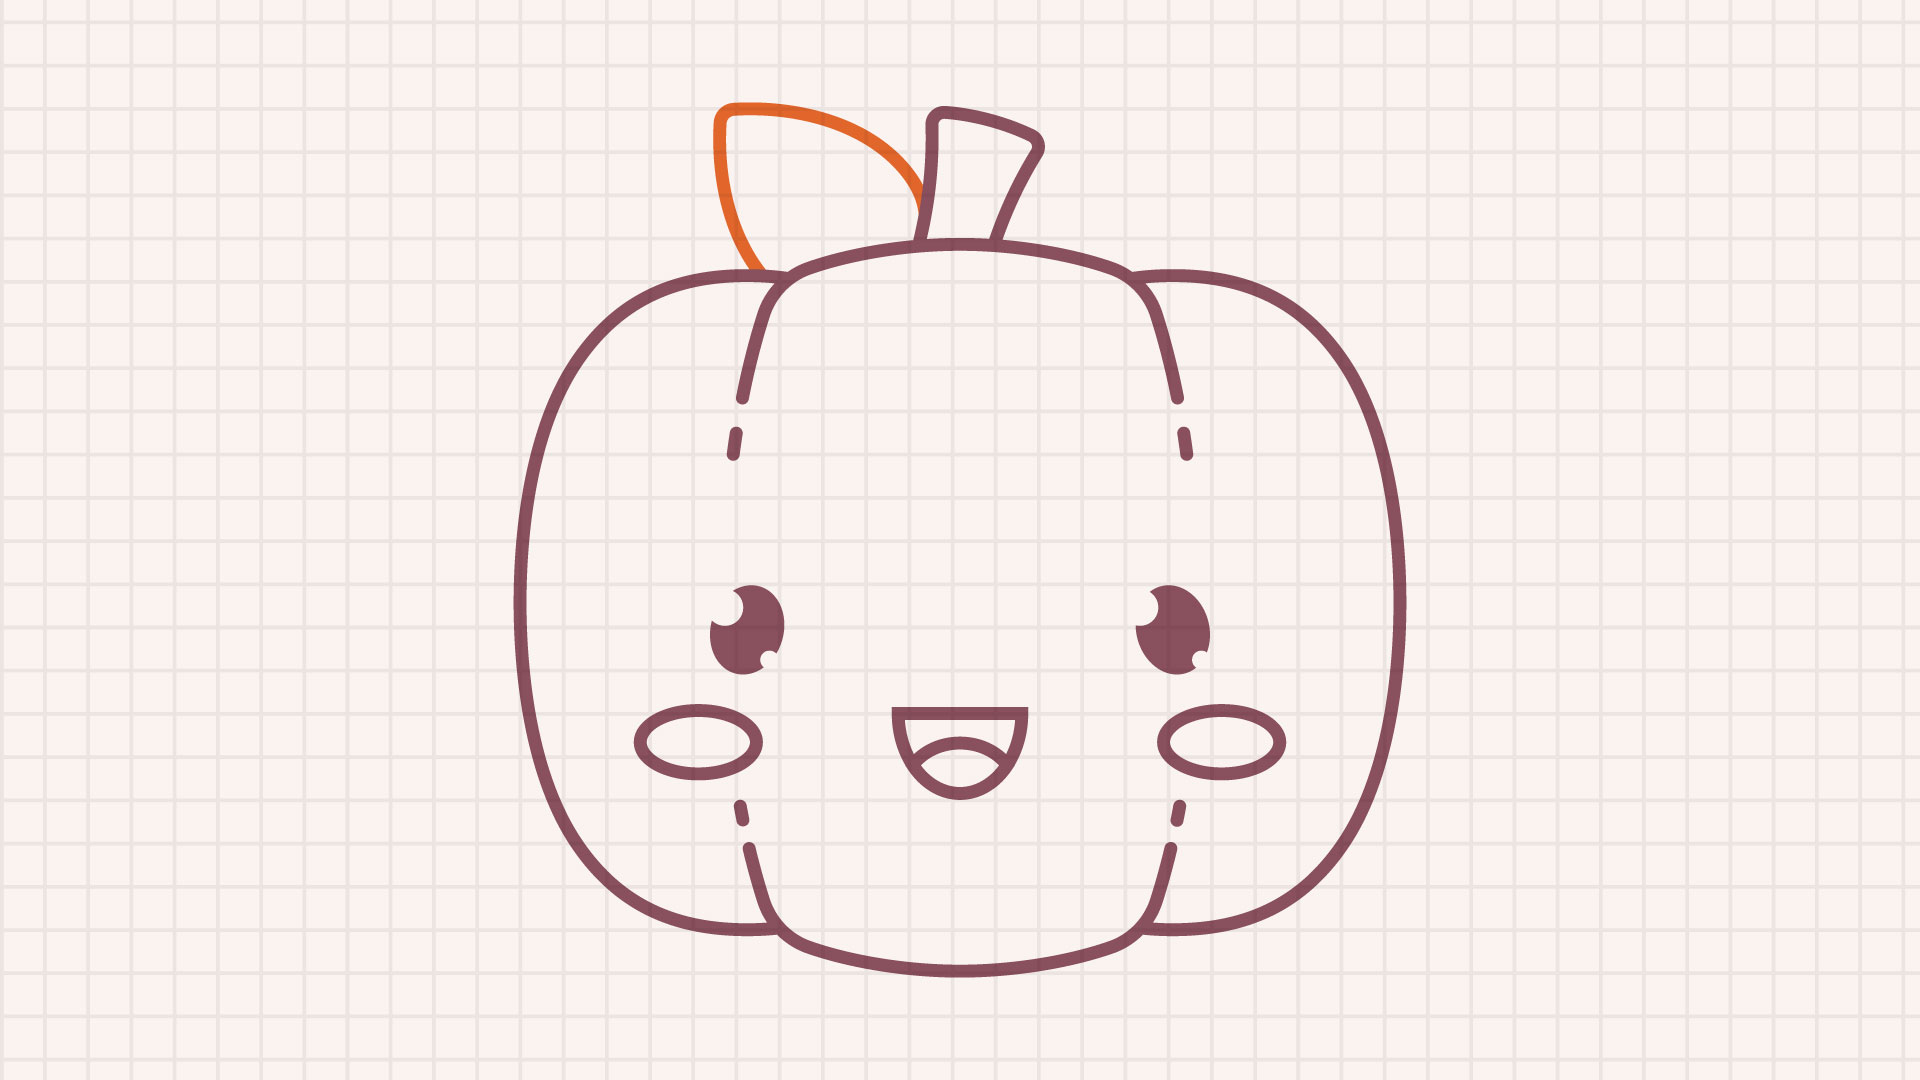
STEP 9
Add a tendril on the right side.

STEP 10
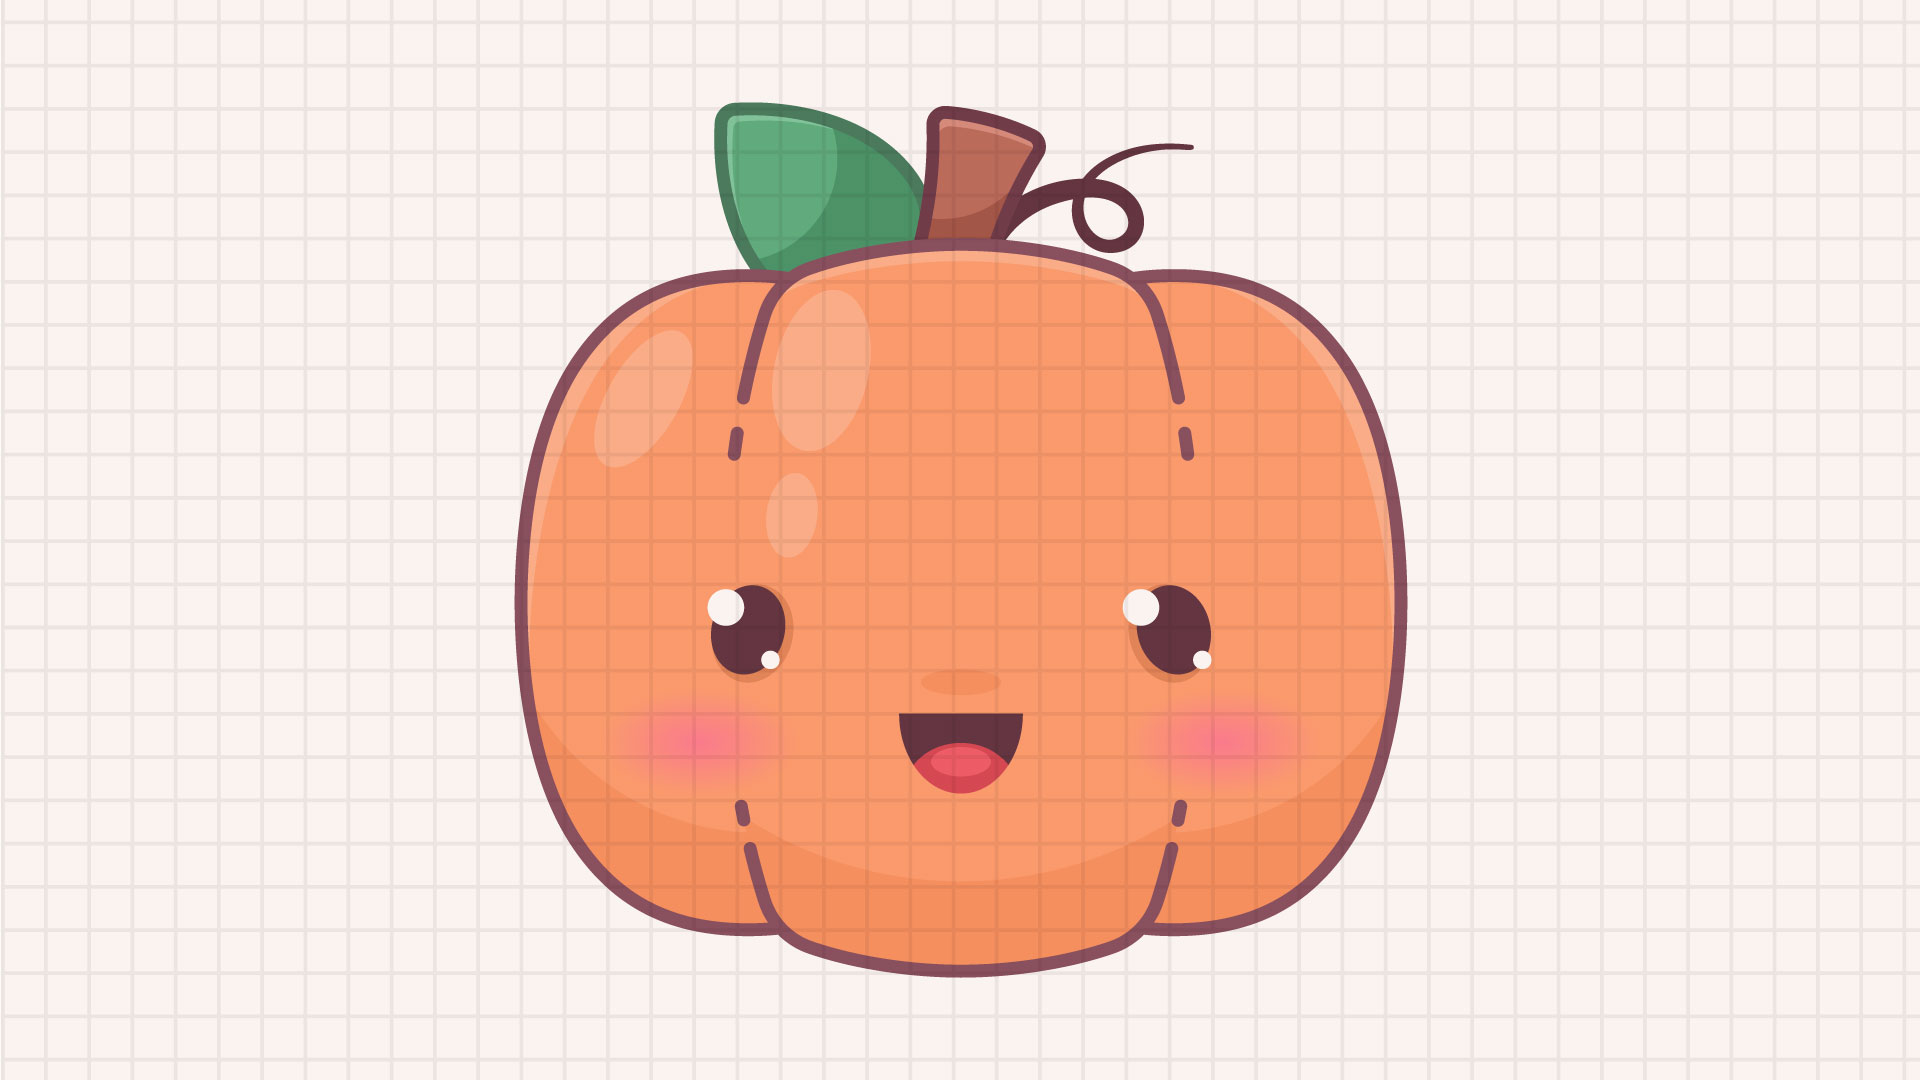
Ready! Color the pumpkin with colored pencils or a marker
Last Update:
December 20, 2025


No Comment! Be the first one.