


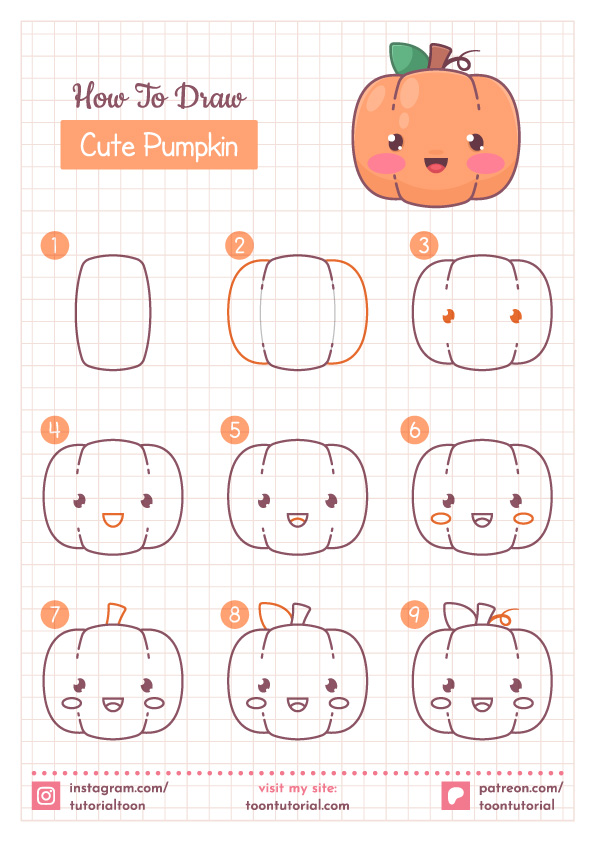
Draw a Cute Pumpkin
Free printable A4 PDF worksheet for guided drawing activities, helping users create images through basic stages.
- Step-by-step drawing instructions
- Guided sketch exercises
- Materials: Pencil, eraser, paper
- Stress relief and mindfulness
- Print as many times as you want
- Suitable for all ages
- No prior experience needed
- For personal use only
Items per page
Loading
|
File
|
Size
|
Type
|
Last Modified
|
Downloads
|
Get File |
|---|---|---|---|---|---|
|
174 KB
|
pdf
|
Feb 22, 2026
|
0
|
Download |